I’m so excited to share this one with you today. I’ve been waiting all week!
This is the story of “The Wall.”
“The Wall” is the main focal point in the nursery and for us, a place to sit and worship Jesus while we sit in this nursery. It reminds us of everything that God is and all the reasons we love and worship Him. If you sit and just stare at each word, it can really become a holy time of worship.
Have I told you lately that we love the Lord? That He has been exceedingly, abundantly, overwhelmingly good to us?
It’s also a really good reminder for us of our first love—we love Jesus more than we love Liam. And out of that, we’ll be able to love Liam well. And our prayer is that Liam will love Jesus first, too. So putting the names of God around Liam’s initial seemed like a really fitting symbolic way to remind all of us that God is first.
So here’s where the original idea came from…Pinterest. There are tons of wall decor ideas on Pinterest and one day while perusing several years ago, I found this collage that had a combination of black picture frames and words.

I found it to be an organized hodge podge of beauty and I pinned it and tucked it back into the recesses of my mind. Add to that this really beautiful painting that displays the names of God, and viola! The Wall was born!

I talked to my mother and she recommended a website for the words. It’s something she’s used extensively for church and has been very pleased with the quality and ease of use. The website is called “Words Anywhere.” Check it out here. We ordered 17 words varying in size and length and paid less than $65. They came on time, perfectly spelled, and exactly how I ordered them. Not only that, but as we began the project, they were incredibly easy to use and we found the quality to be top notch. We’d highly recommend this company to anyone wanting to put word decals on their walls. Even textured walls! We had no problem…just had to press extra firm and make sure there were no bubbles.
First, Jason and my dad measured an 8’x3′ rectangle on the wall and outlined it with red string {Jason looks like a deer in headlights}:


Then, we measured the same size rectangle on the floor and began to lay out the frames and the words. We tried to follow a few rules. First, we tried to keep the pictures and words on the top and bottom plumb with the horizontal top and bottom of the entire rectangle. Second, we tried to balance the number of words and frames on each side of the center. Third, we chose an “L” with a large frame to be the center of the entire wall. What’s really cool about these pictures is that several of them are antiques that belonged to my grandparents. My mom bought black paint and painted them all so they could be repurposed and used in the nursery. So cool!
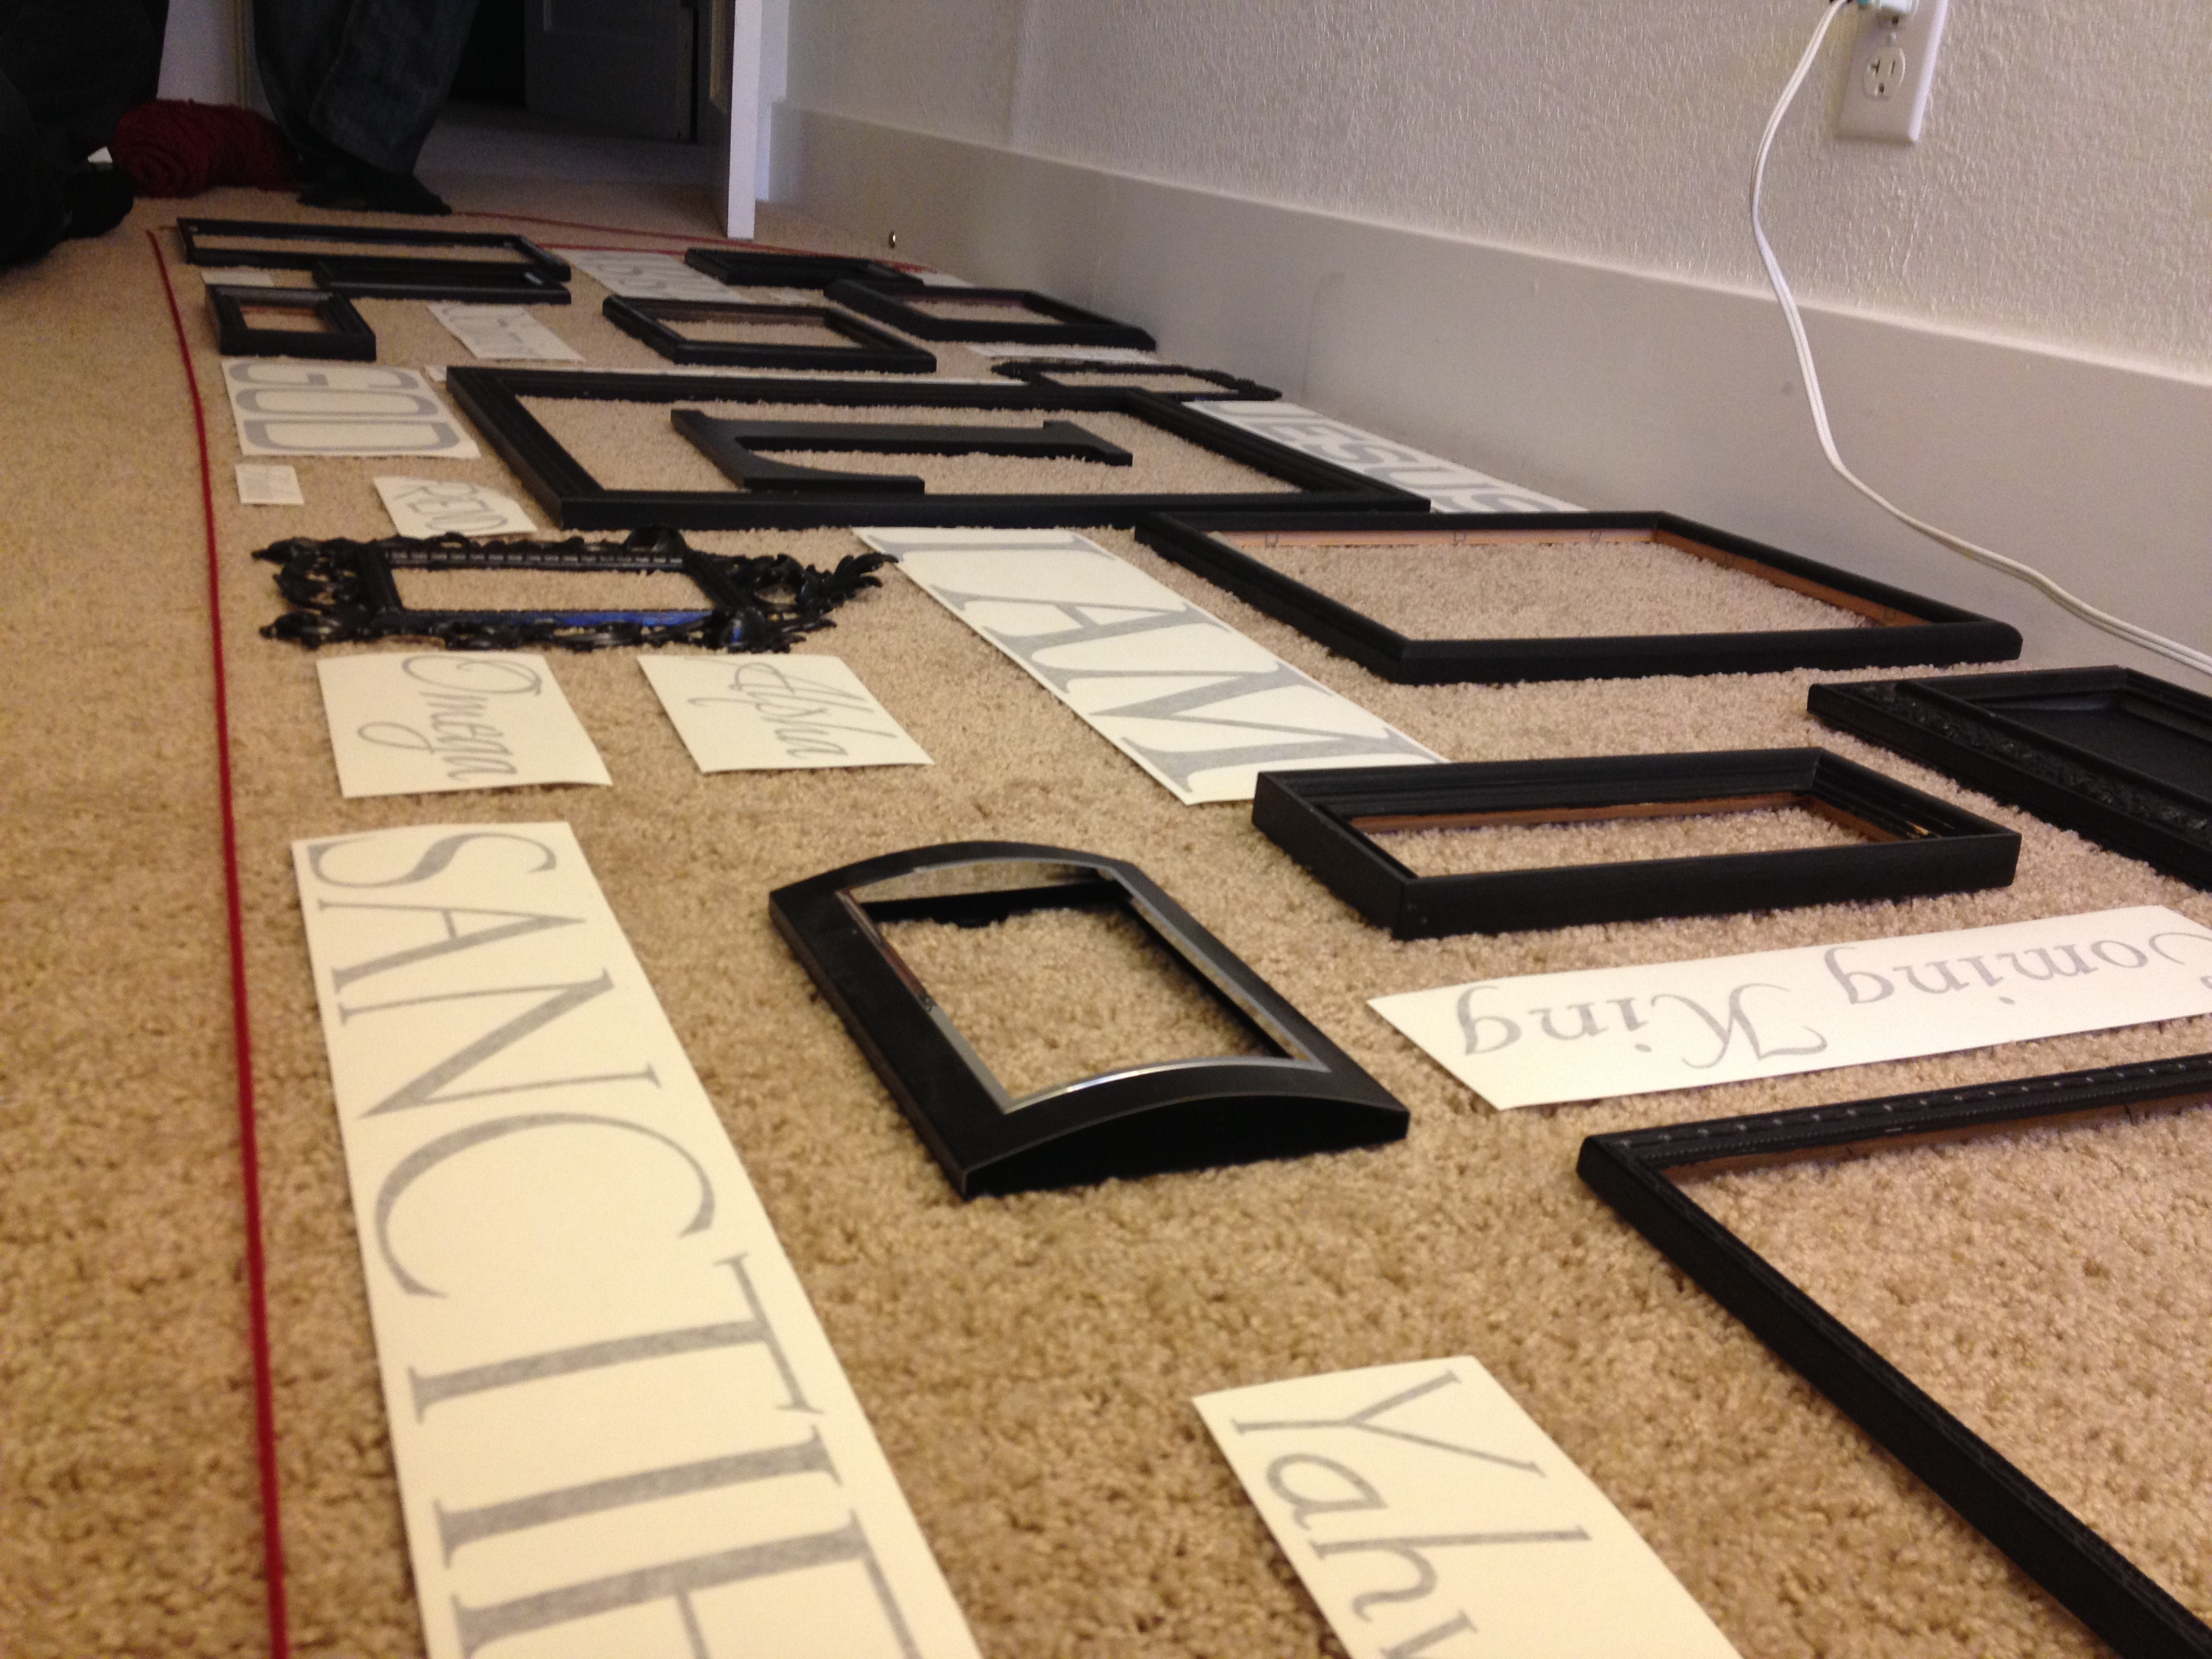


Once we had a pretty good idea of where everything would go, my dad drew out a sketch of the entire thing and took time to measure between all the frames. Then he and Jason began hanging the frames.
While they did that, I began my “L” {for Liam} project. I bought different sizes and textures of yellow, teal and green buttons. The “L” was already painted black when my mom bought it at Hobby Lobby, which saved me some time {I should also mention that this was a Pinterest inspired project}.

I decided to do the colors in horizontal bands going down the “L.” I tried to mix up the colors and sizes across each band to make it less structured and rigid looking.

Once I had finished doing the bands all the way down the letter, I went back through and emboldened each section with buttons on top of buttons to give it a more layered look. I was really pleased with how it came out!

And, I loved how it looked on The Wall {I was going to stick with the black “L” until Jason convinced me otherwise — read more about how Jesus and Jason saved the nursery}!

After my dad and Jason had hung all of the frames, we went through and taped all of the words in place between the frames. As I mentioned, there were 17 words total. Once we got them all taped up, we remeasured and took a final look to make sure everything was where we wanted it. It was!


So we began the process of applying the decals. It was really easy and actually didn’t take that much time. I think with Jason, my mom, and I we finished all of them in about a half an hour. To apply, you tape the word on along the top horizontal edge of the word. You then flip the paper up, peel off the backing, and lower the word onto the wall. Using your hand, you firmly press the paper into the wall so there are no creases. Then using a rectangular plastic card, you begin scraping the decal onto the wall. When you’ve completely outlined the letters, you can peel off the rest of the paper.


It worked so well! I did the peeling and sticking and final peels, and Mom and Jason did the scraping. Before we knew it, we were finished and Jason was hanging the final frames back on the wall.


And we were done. Here is the finished product.*

It wasn’t until a few days later that we realized there was something really special about the wall. Can you see it?
It was totally unplanned. Totally unintentional. In fact, originally we were going to place “Jesus” above the “L” {as you see it in the picture}, and “God” below the “L.” But the words needed to be adjusted because of the frames, and we ended up putting “I AM” underneath the “L” instead. Not thinking anything of it.
So what was the surprise? Do you see it? Putting “I AM” below the “L” ended up spelling “Liam.” So funny! God is so gracious and has such a wonderfully personal sense of humor.

So that’s it! The Wall. I hope you love it as much as we do. Like I said, I sit here and stare at it and worship God. I also sort of think it’s hilarious that “Sanctifier” ended up being right above the diaper change pad. I’m sure He’ll most certainly be sanctifying us as we change poopy diaper after poopy diaper. I put the * next to “finished product” because the wall won’t actually be finished until it includes the black and white photos we plan on putting up from our maternity photo shoot and then pictures of little Liam once he’s here. That will be the real finished product!
Come back tomorrow to see the final photos of the entire nursery with a few other cool projects/ideas that we added in. Happy almost Friday, everyone!